Shipping Method for Fragile Large and Medium Pictures and Art
Updated with a YouTube video of the process (refined a bit).
One of the things I like to sell is original art and signed / numbered prints or any interesting print for that matter. I find that I can sometimes acquire them at a reasonable price as many resellers will shy away from these types of items as they require sometimes complex and careful packaging to ship and considered risky. I personally find that to be an opportunity and have gotten to a solid level of experience shipping pictures as large as 36” x 48” or even larger.
There are a couple things that I feel are key, first is that in order to keep the glass from breaking, you need to package the picture such that it has minimal flex in the final box. Second, layers are essential and normal medium to large pictures will have 4 layers of bubble wrap and cardboard on all sides. Of course, it is a good practice to always use corner protectors which are very easy to make yourself and I picked that up through YouTube.
My process is pretty repeatable now a days and it all starts as follows:
1. Check to see if there is any play in the glass and frame, if so I use painters tape to minimize any movement horizontally and vertically. I will wrap the picture in wrapping or craft paper first and put extra packing tape on any petrusions which might rip or poke out (like the hanging hardware). Most get wrapped in plastic with a few silica packs.
Update: I now put cardboard against the glass then put bubble wrap over it. Reason is that if it breaks, the cardboard might keep the glass from moving so much to damage the print.
2. Now I apply the corner protectors and tape them into place.
Update: I used to make them but time is money and just buy them in bulk.
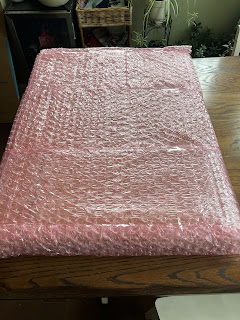
3. I will also use strips of cardboard to cover all 4 sides of the frame. I then put bubble wrap over the glass and the back. I normally will use a medium 5/16” bubbles wrap. Or maybe do bubble wrap before the initial warfare after the cardboard against the glass….yeah, that’s it.
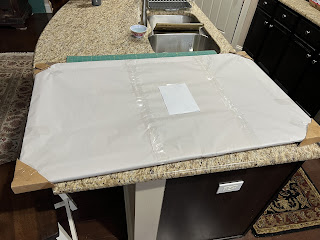
4. Then I put a piece of cardboard the size of the picture on top of the whole picture on front and back.
This is what it looks like after this step, so that is 2 layers so far.


The box itself constitutes the 4th layer.
Update: For large and medium pictures, I now glue and additional layer to the inside front and back of the box, reason is if they drop on the side, it has more resistance.
Update: I have moved to a mix of Gorilla Glue sticks in my glues gun and some tape to reinforce, I like the outcome.

I use a lot of bubble wrap and sometimes I have to go buy heavy duty new boxes if I don’t have some available already, but usually only for the largest pictures. As far as time, this particular picture probably took me 1.5 hours and one medium I did the day before took me 51 minutes. It’s therapeutic though and would rather the buyer has to take a few minutes longer to unpack, but finds the item as described. So far no damage reported on pictures (well, 1 mirror and we determined it had a pre-existing crack we didn’t see). This process is the same regardless of value, and always stick to one of my key values which is to pack properly first….then weigh and measure.
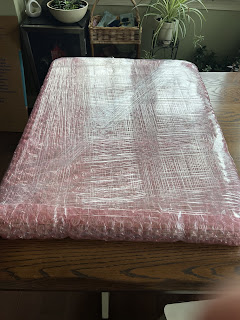
Here is another as it went through the process. Notice that even though I don’t have 24” wide bubble wrap, I deal with it simply by taping 2 pieces together. I also don’t pack at home in the kitchen any more…happy wife…happy life thing and all.


Comments
Post a Comment
No URLs, I delete comments which appear to be be advertising.